In this article, you will learn how to set up a custom date reminder workflow trigger, and an example of what it can be used for
- Select the “Add New Workflow Trigger” button.

- This will pull up a list of trigger selections on the screen's right-hand side.
- Scroll down until you see the section called “Contact.”
- Select the “Custom Date Reminder”

- Find/Create the custom date field list within their profile
- Please Note: you have to add a filter for the workflow to function
To create a custom date field
- Click on the “Settings” icon
- Scroll down to the Other Settings area and select “Custom Fields.”
- You will see a “+ Add Field” button.

A box will appear, giving you the option to choose your Custom Field
-
- Under choosing options, select “Date Picker.”
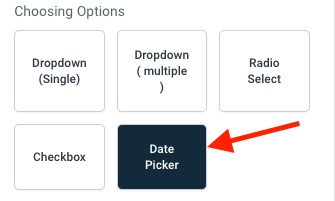
- Now click the blue “Next” button.

- Make sure both the Object and Group are selected
- Once done, click the green “Save” button

- Next, return to the Automation section and select the previous workflow trigger.
- Click the blue “Add filters” button

- Now in the Standard Fields tab, select the new “Custom Date Field” we just created

- This will now give you the option to select the “Custom Date” filter

- Please Note: you can change the name of the workflow trigger. This typically helps keep everything organized and easier to understand

- Click the green “Save Trigger” button on the bottom right

- For Example: in this situation, the custom date reminder is called “Subscription Ends” (See Below)

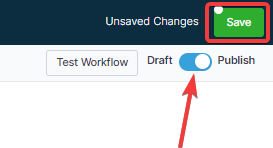
- Press Save in the top right corner of your browser to save the workflow
- If your workflow is ready to be enabled, make sure the toggle switch under Save is set to Publish
- Be sure to test your workflow and set it up correctly using the Test Workflow button next to the Publish toggle switch.
- For an in-depth overview of Workflow Testing, see our article, “Using the Testing Features in Workflows.”
Your workflow to go with the Custom Date Reminder Workflow Trigger.