Using the Pipelines feature, you can more efficiently manage your leads for your business. This tutorial will show you how to easily create a new pipeline or change existing ones.
Step 1: Accessing the Pipelines page
- Navigate to Settings > Pipelines
- Here you’ll see a list of all your existing pipelines.
- Click the Edit or Delete icons to make changes or delete a pipeline.
- Click the green button to add a new pipeline
Step 2: Adding a New Pipeline
- Click the +Create new Pipeline button
- Fill out the information in the popup window.
- Give the pipeline a name, add stages, and choose the visibility.
- NOTE: you can determine whether or not each stage is visible in the pie chart and funnel chart, as well as choose if the entire pipeline is visible.
- Using the arrows next to each stage, you can modify the order.
- Continue adding as many stages as you’d like.
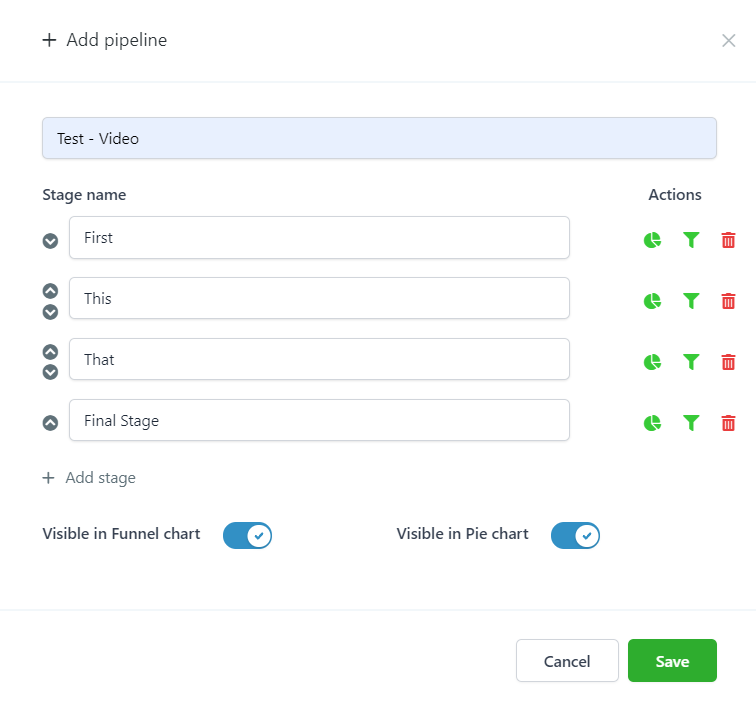
- Save to confirm your changes.
- Now this newly added pipeline will appear on your Pipelines page.
- You can click the edit icon to make any additional edits.