How to Add or Upload Affiliates
This article is a review of how to add or upload affiliates to NicheFit. Check out our other Affiliate Manager articles for tips, best practices, and an overview of the feature.
Step 1: How To Add Affiliates
- Navigate to Marketing > Affiliate Manager > Affiliates
- Click +Add, and a dropdown will appear
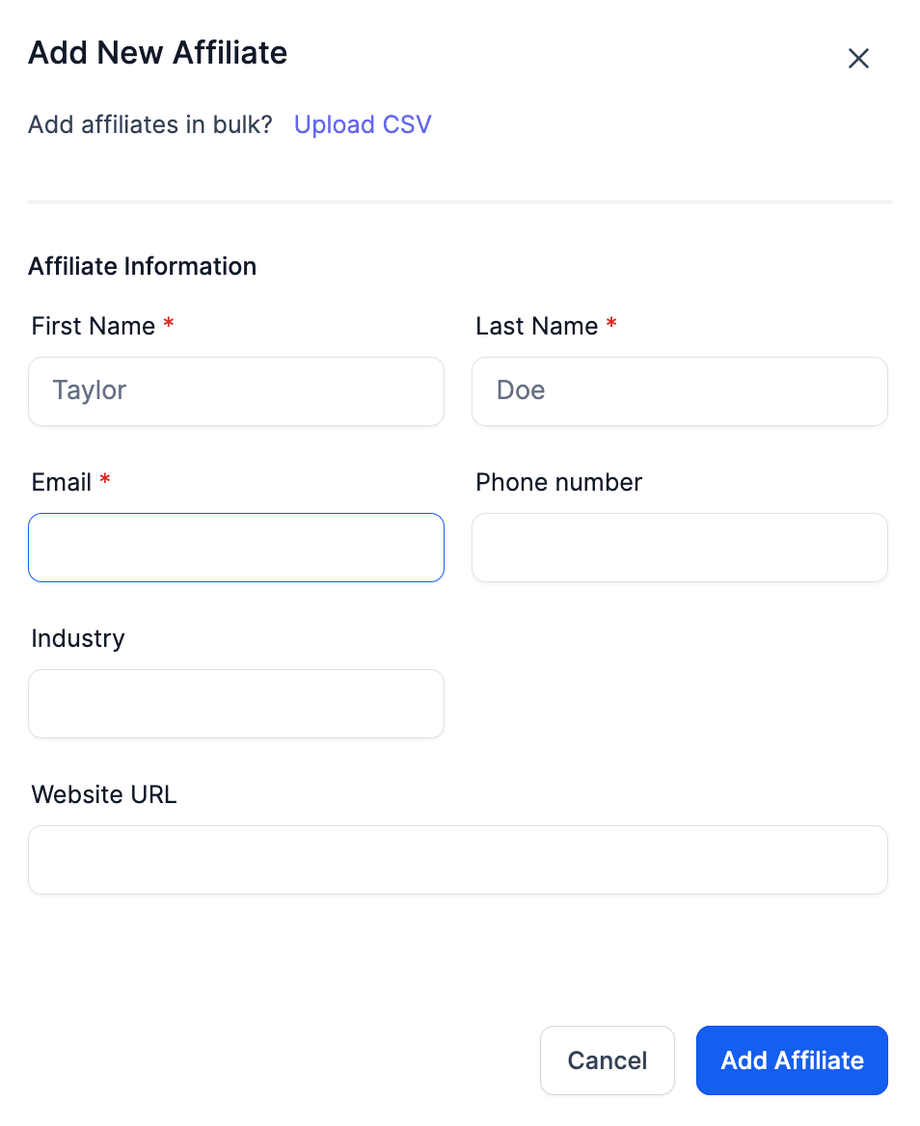
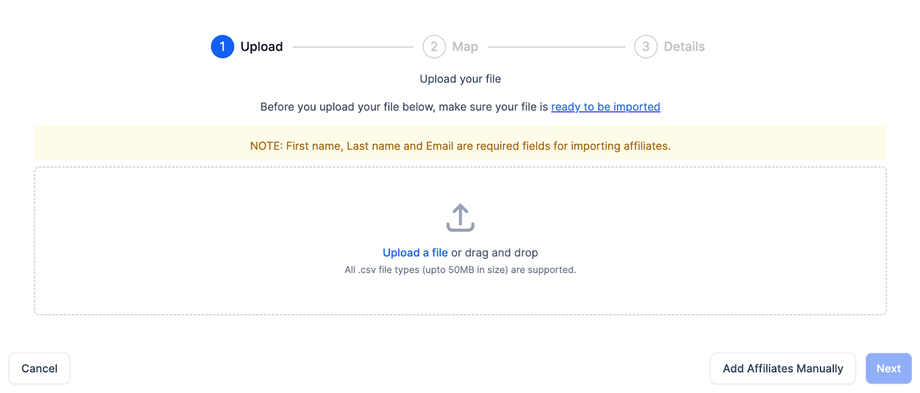
- Select New Affiliate to add an individual affiliate or Upload Affiliates to upload a list of multiple affiliates at once
- For the individual Affiliate, fill out the pop-up that appears and click “Add Affiliate” to save their information.

- For a bulk list upload, use a . CSV file to upload multiple records, map the contact fields, and add them all to NicheFit.

- Ensure your CSV file includes appropriate headers, such as: “First Name”, “Last Name”, “Email-id”, “Phone Number”, “Industry”, and “Website”.
- For Bulk Import of contacts, navigate to Affiliate Manager> Affiliates >Add>Import from contacts and select multiple to import.
Please Note: You can bulk add the affiliates to a campaign when selecting or creating a new campaign.

Step 2: Getting an Affiliate-id for each Affiliate Manager Campaign
- Navigate to Marketing > Affiliate Manager > Affiliates.
- Scroll down and click on an affiliate name
- Toggle between your campaign(s) to see the unique ID for each campaign.
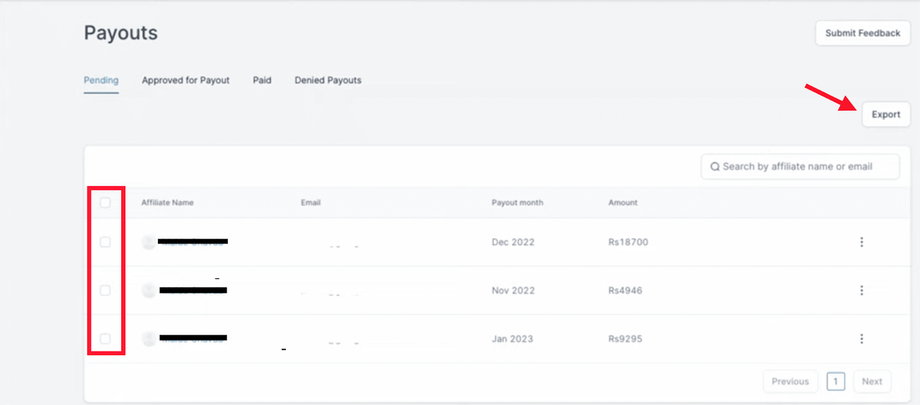
Step 3: Exporting Affiliates
- To export your affiliate list, navigate to the ‘Payouts’ Section of the Affiliate tool, and click export

PRO TIP:
- No system-generated email is sent out when a new affiliate is added to NicheFit. An affiliate does receive a system-generated email when an affiliate campaign is published/live. That email will contain their unique URL Affiliate ID, which they must use when promoting the product/service.

