Settings: Custom Fields
Custom Fields allow you to create contact-specific fields that contain specific information about that contact. These allow you to add to the Standard Fields and gather whatever information you require.
Step 1: Create Custom Fields
- Navigate to Settings > Custom Fields > All Fields
- Click “Add Field”
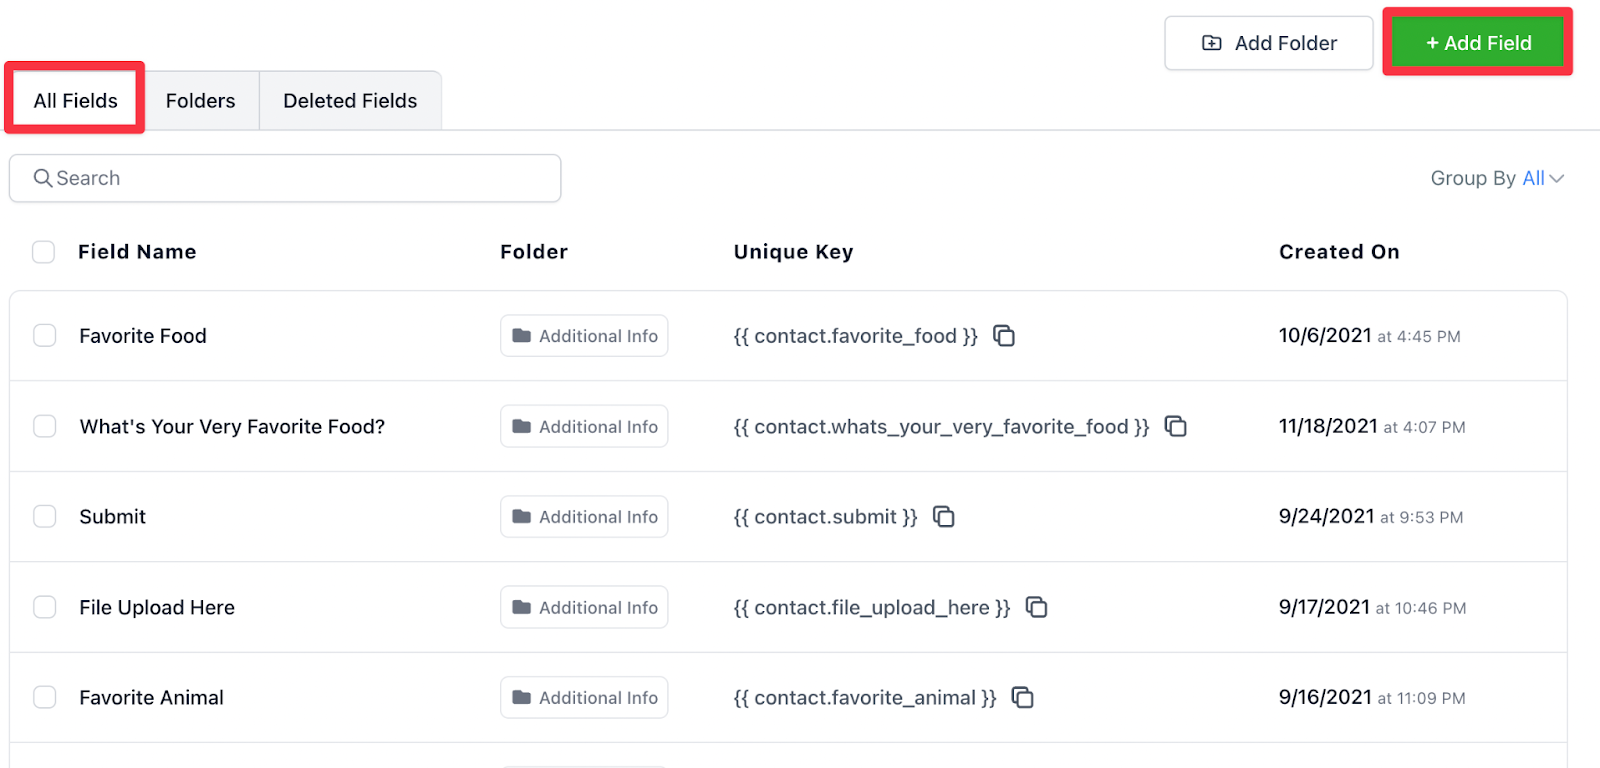
- In the Pop-up, you will have options for what kind of custom field you want to create
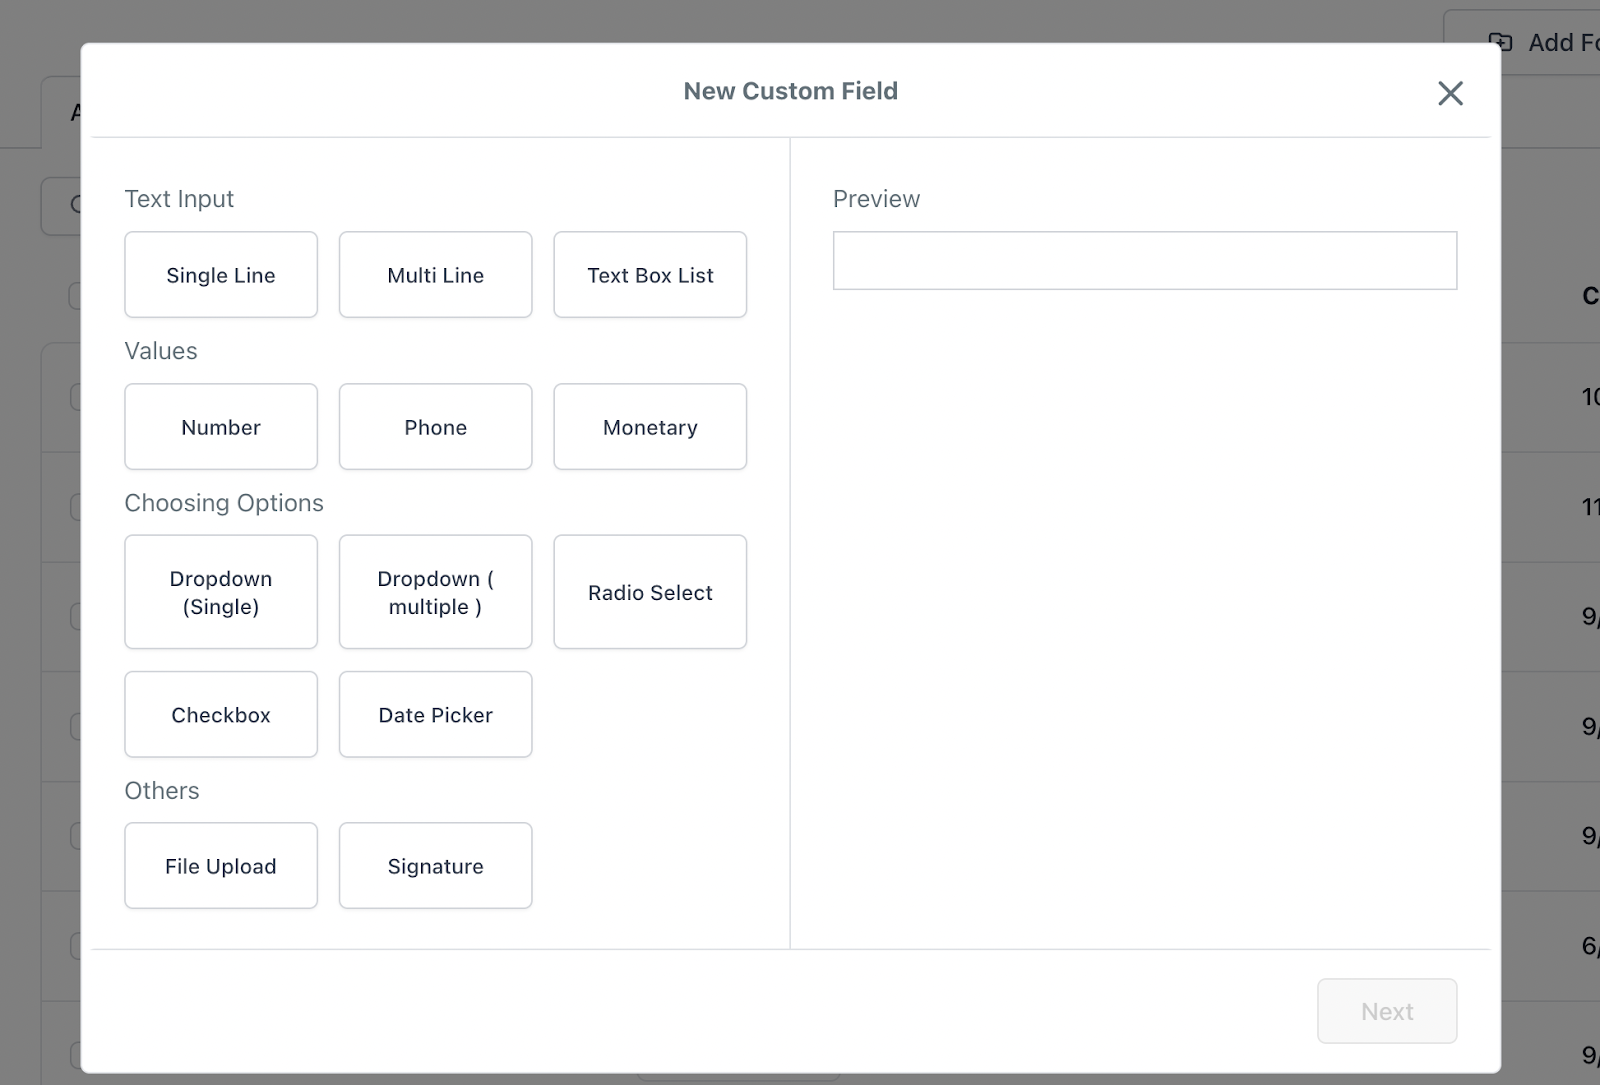
- Choose from the Types of Custom Fields.
NOTE: You cannot edit the field type once you create a custom field. You must delete the field and create a new one to change it.
Types of Fields:
- Text - One-line Textbox Field
- Large Text - Multi-line Textbox Field
- Numerical - Number Field
- Phone - Phone Number Field
- Monetary - Monetary Field
- Checkbox - Multi-option Checkbox Field (multiple options can be chosen)
- Single Options - Dropdown Option Field (only one option can be chosen)
- Multiple Option - Dropdown Option Field (multiple options can be chosen)
- Radio - Radio (circular) Button Option Field (only one option can be chosen)
- Date - Date Field
- Textbox List - Textbox List Field
- File Upload - Allows Files to be Uploaded (or required) with submission - Files allowed include PDF, DOC/DOCX, JPG/JPEG, PNG, and GIF.
- Signature - Signature Field
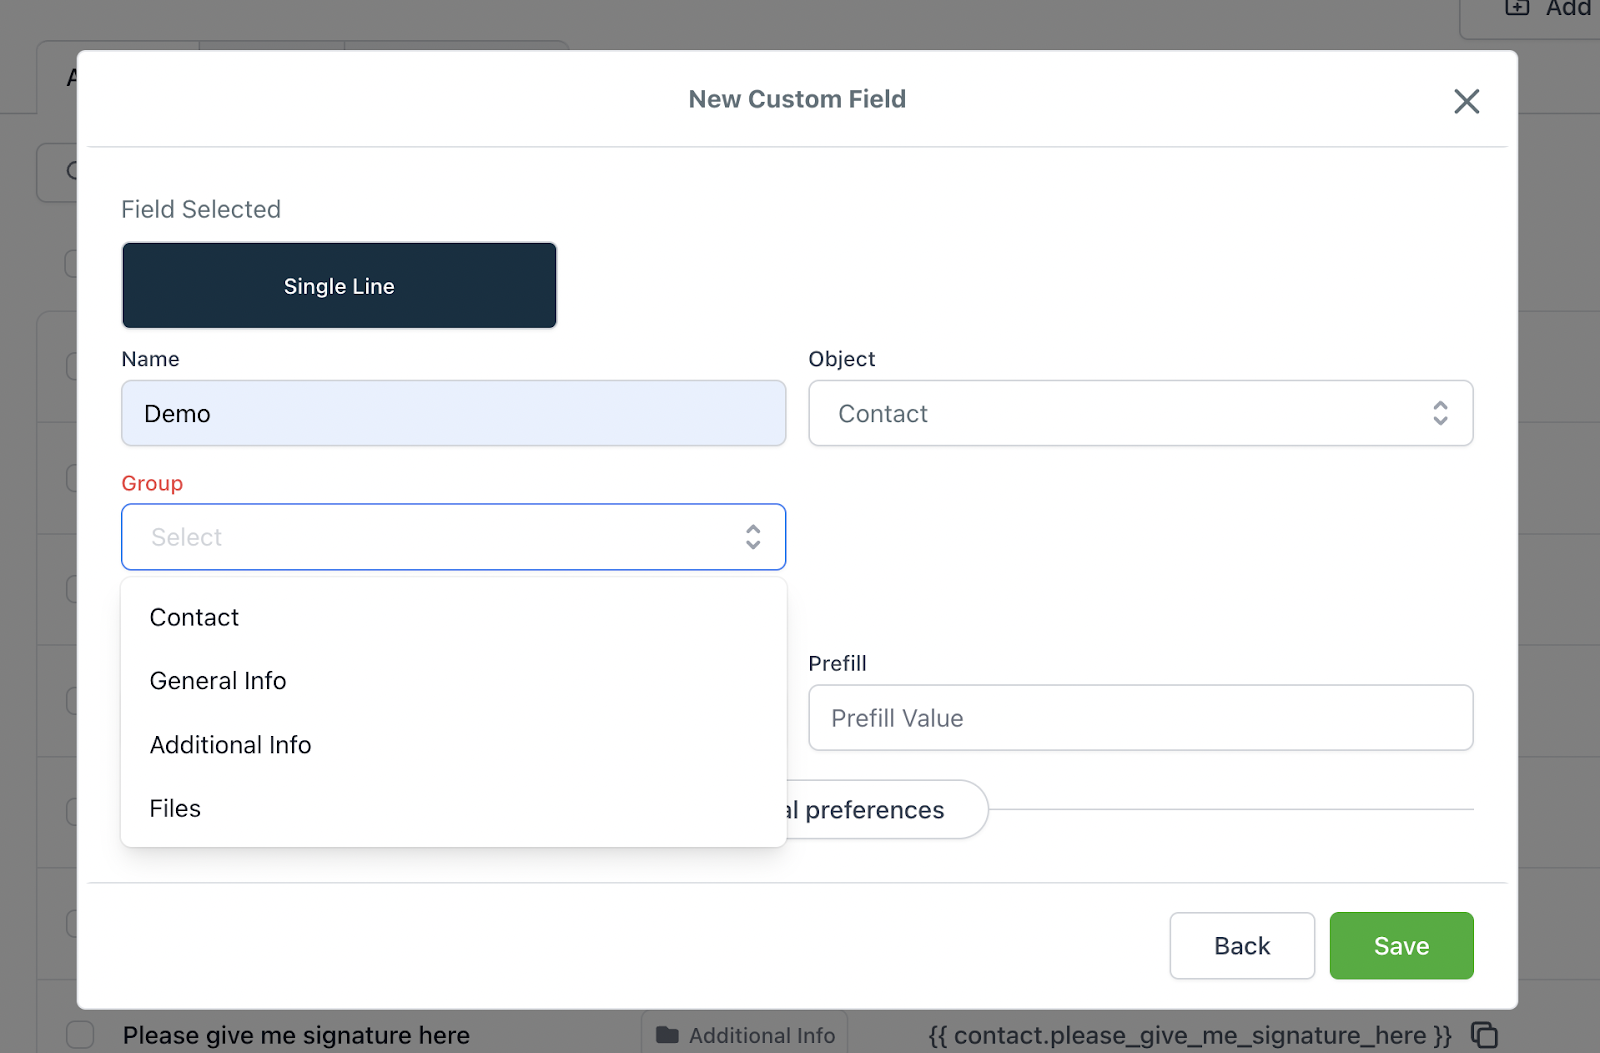
- Enter the Name of the Field.
- The Name of the Field is what you will see in the contact profile. This will also show on the form/survey if "Show Label" is enabled.
- Enter the Placeholder. Placeholders will show in the box (specifically for text or other manual entry fields) in a form/survey.
You can add this to a specific folder group. When entering the information for this field, there will be a dropdown for “Group”. You can select which folder you want this field to be organized into.
- Enter any other applicable information for the field
Step 2: Utilize Custom Fields
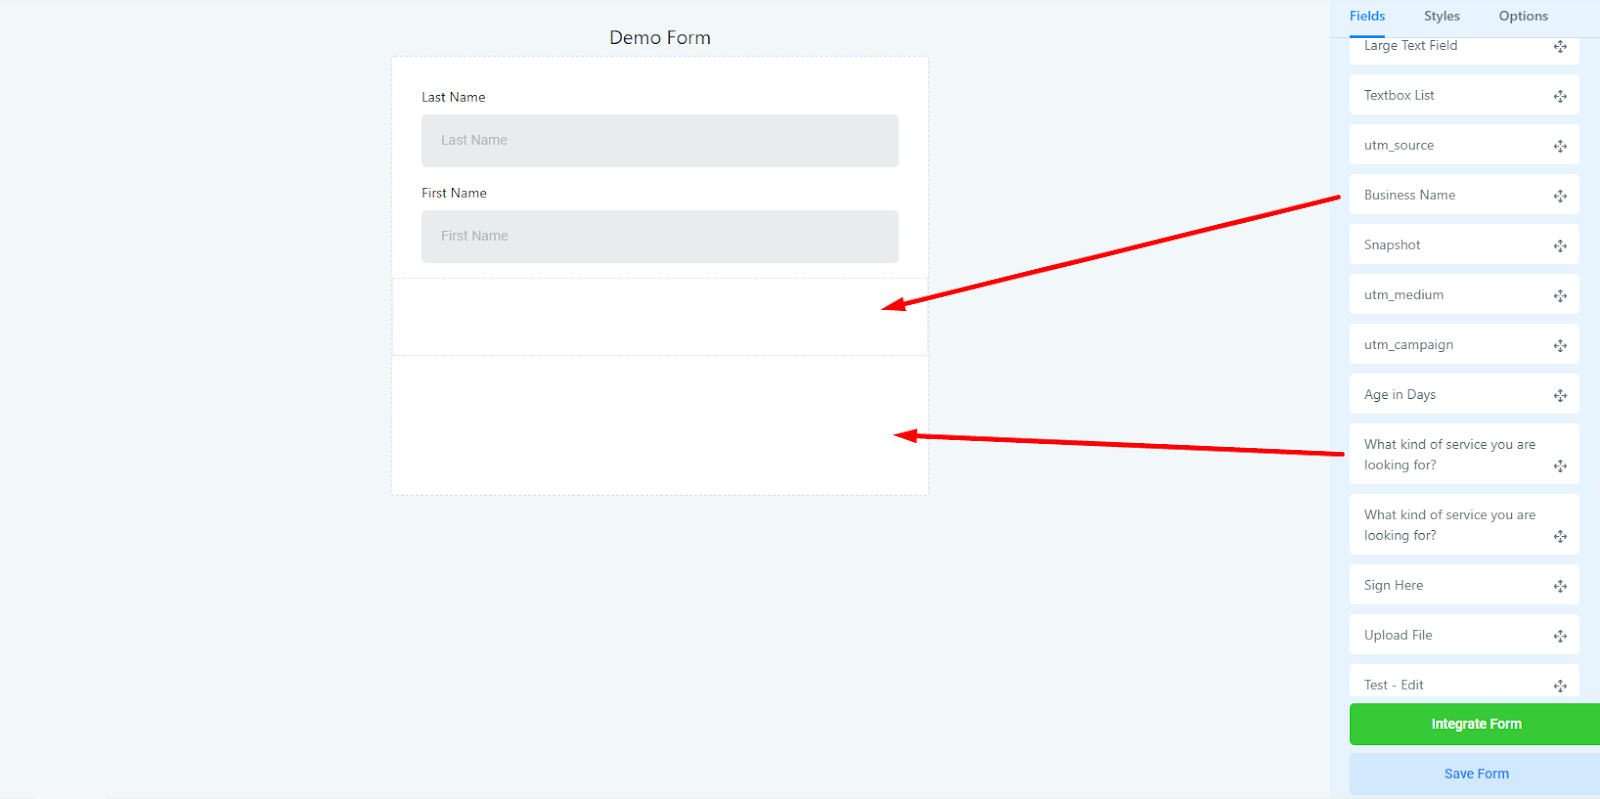
- Drag and Drop From the Custom Fields Section of Form or Survey Builder to Utilize the custom fields.
NOTE: Custom Fields can also be created within the Form or Survey Builder. They cannot be edited (permanently) or deleted within the Form or Survey Builder.
Step 3: Edit & Delete Custom Fields
- To either Edit or Delete A Custom Field, navigate back to Settings > Custom Fields
- Click on the Pencil Icon to Edit a Custom Field
- Click on the Trash Can Icon to Delete a Custom Field
You can also create Custom Field Folders and map fields within the folders.
- Custom fields can be moved to different folders, helping keep track of your custom fields.
- These Folders will also appear in the contact Card to organize your data collection.
- You are also able to seamlessly restructure contact fields
NOTE: You can also drag and drop the fields to reorder how they are seen in a contact profile under "Additional Info". Just click on the three horizontal lines on the far left side of each Custom Field and drop it in the order you want.