Using a webhook with Zapier or, in advanced cases, other programs using API management solutions is possible with NicheFit. You can export/import data to and from NicheFit with another platform or system with webhooks. This is useful if you utilize multiple systems and want to exchange information with NicheFit. (Check out our Webhook setup article if you need an overview of creating and using Webhooks.)
Please Note: This is a premium app option in Zapier. There are options for integrated apps to accomplish this without webhooks with limited triggers and actions depending on the application. Browse options for that here: https://zapier.com/apps
In this article, we will go over the workflow action Webhook
Within the Workflow builder, perhaps you want to use it for information or a booked appointment to fire off a webhook action. You can start with that action as a trigger within the Workflow builder, which will fire off a webhook action.
- You can send information with a POST hook or request information with a Get Hook.

- You would provide the webhook from Zapier or the webhook source in the URL field and provide any custom data key and values that you want to include

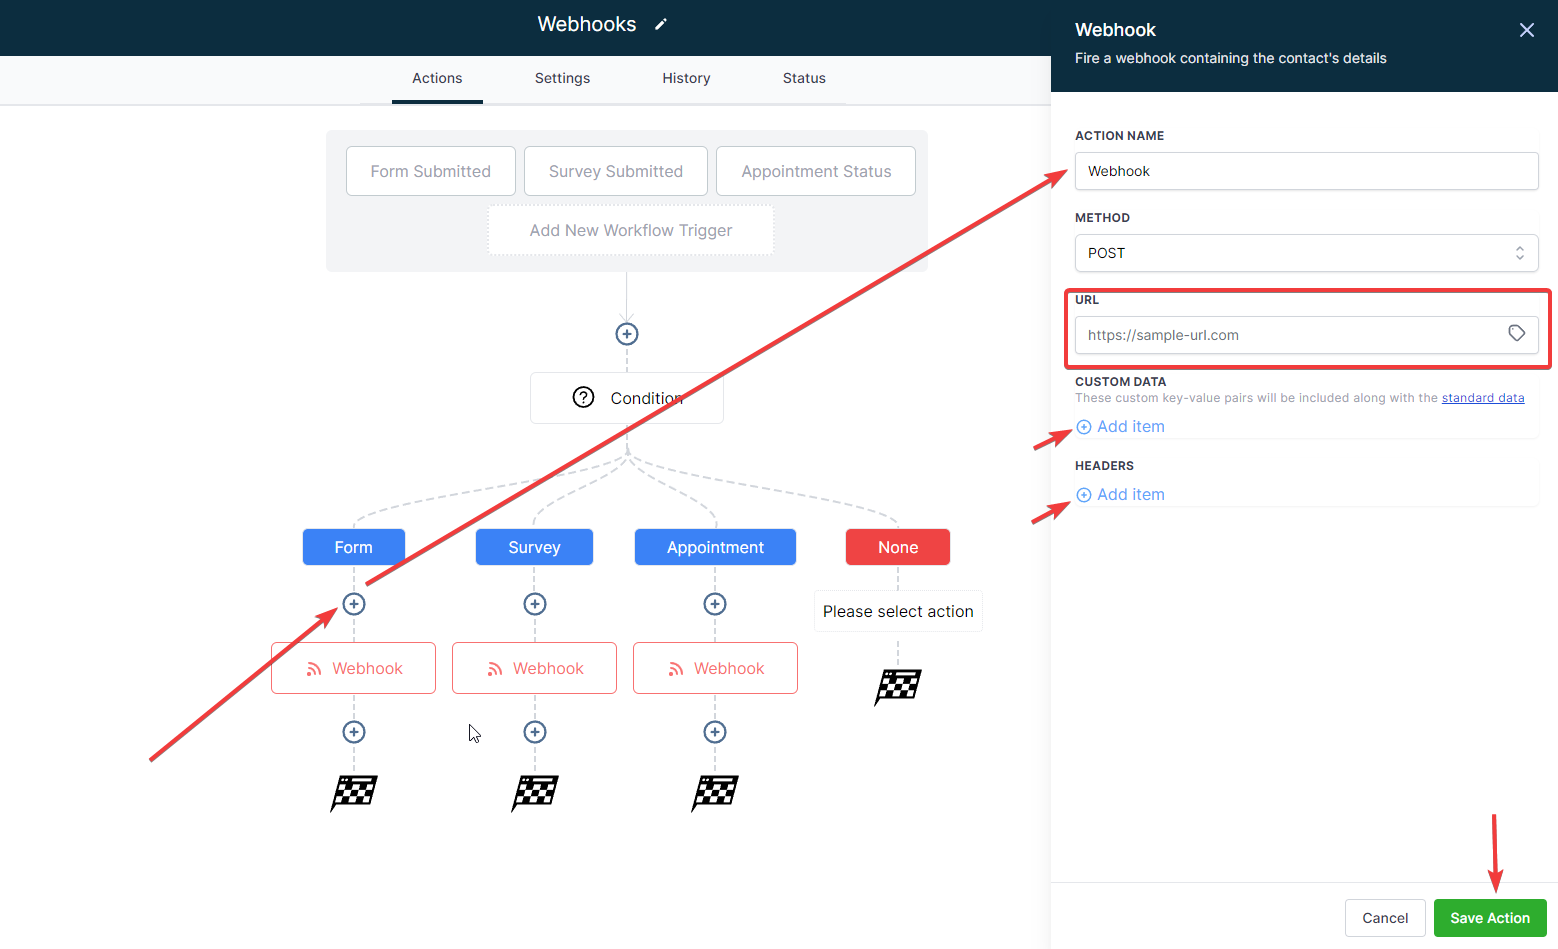
Here’s a sample workflow/webhook example:
- Create a Workflow Trigger for an action such as Form Submitted, Survey Submitted, or Customer Booked Appointment.
- Click the + to add an action to your Workflow.
- Choose Webhook.
- In the popup, name your action and add the URL (from Zapier or any other webhook source you are using).
- Provide Custom Data if applicable
- Save your changes to the webhook.
- Test
- Publish and save the workflow
NOTE: The specific type of information that comes through will depend on what you set up in the webhook, meaning a form will pull through form data, an appointment will pull through appointment and contact data, raw webhooks will pull in raw data, etc.