Conversations Overview
In this tutorial, we’ll provide an overview of the Conversations section of your menu. Read on to learn how to navigate through this section.
- Accessing Your Messages.
- Click into your Conversations inbox.
- You’ll see a list of your messages in the first column on the left.
- You can navigate between unread, starred, and all messages using tabs. Unread messages are messages that have not yet been read. All will, of course, be all of your messages.
- You can search in the box at the top for a specific message or use the dropdown menu to sort from the Oldest or Latest messages first.


- Viewing Conversation History
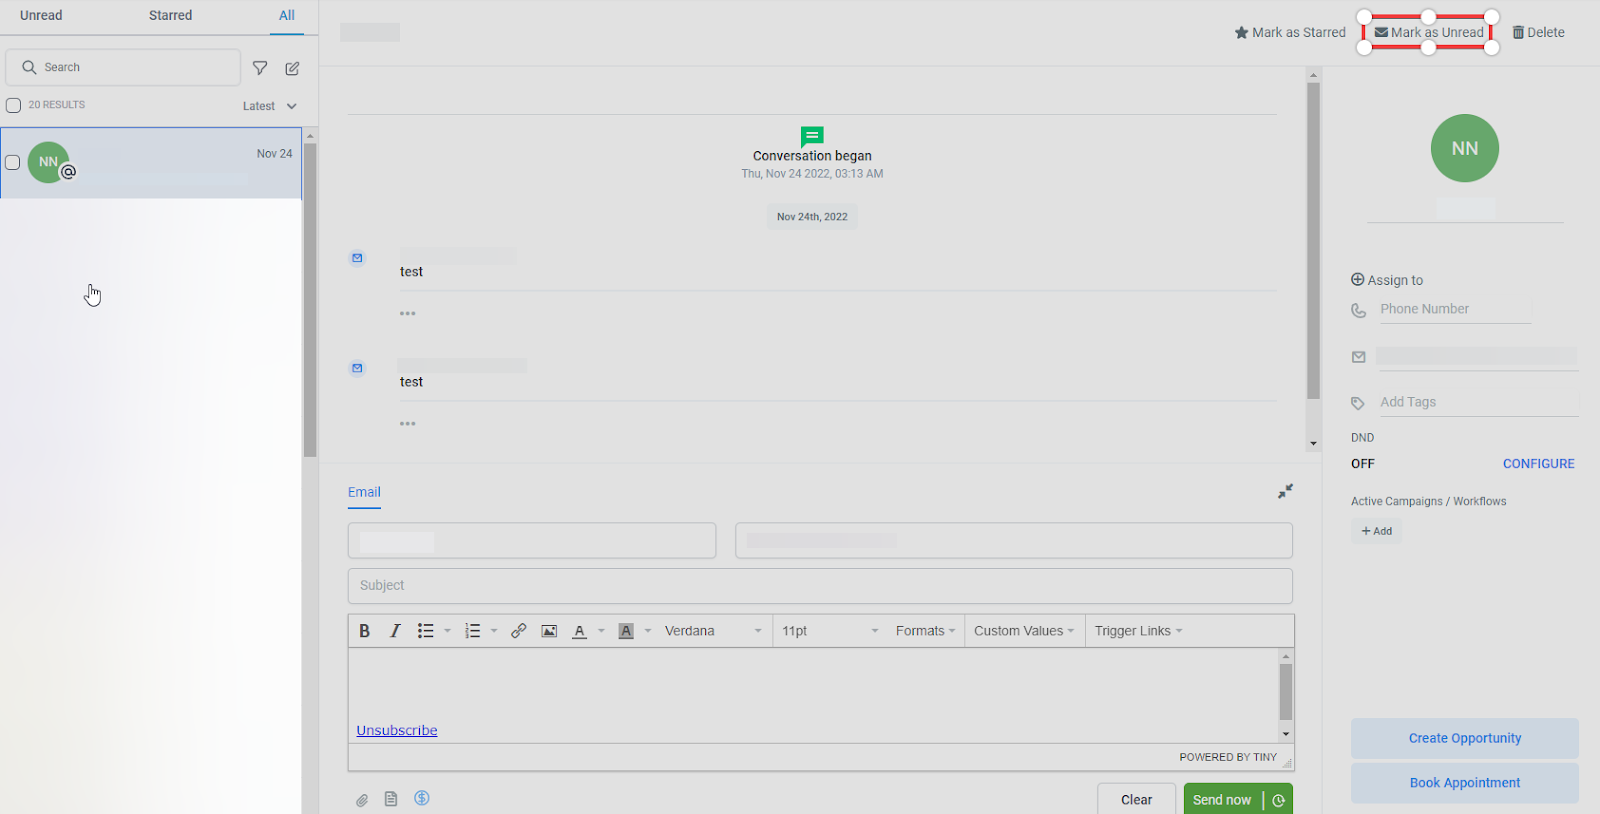
- You'll see the conversation history in the center when you click on a message.
- You can scroll up and “fetch older messages”, depending on the length of history of conversations you've had with the particular contact.
- When searching for a conversation, you can filter by Assignee and last channel of communication (i.e., Facebook, Instagram, SMS)
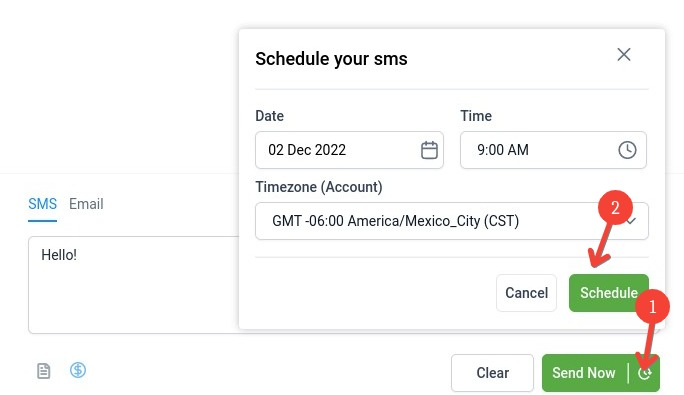
3. Schedule Message. With this feature, you can schedule messages directly on the conversation page with your contact and send them later. This includes both SMS and Emails. A seamless & effective way to send your messages later.

- You can pick the date and time you want the SMS/Email sent. By default, NicheFit will have this as sent on the next day at 9 am. You can also pick the time zone you want this message to be sent.
- Write your message, then click the Schedule icon and then the Schedule button.
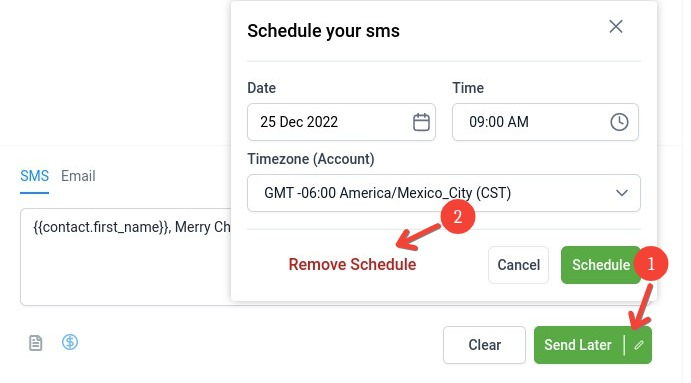
- If you want to edit your scheduled SMS/Email, click on the pencil icon to open the scheduling card to edit.
- If you want to cancel the schedule message, click the pencil icon, the Remove Schedule button, and close the pop-up.
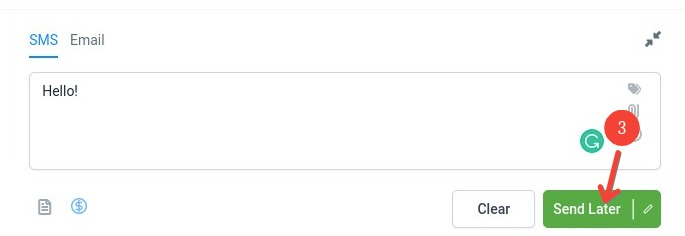
You will then confirm you want to schedule this SMS/Email by clicking on the Send Later button. That will put your SMS in the queue.
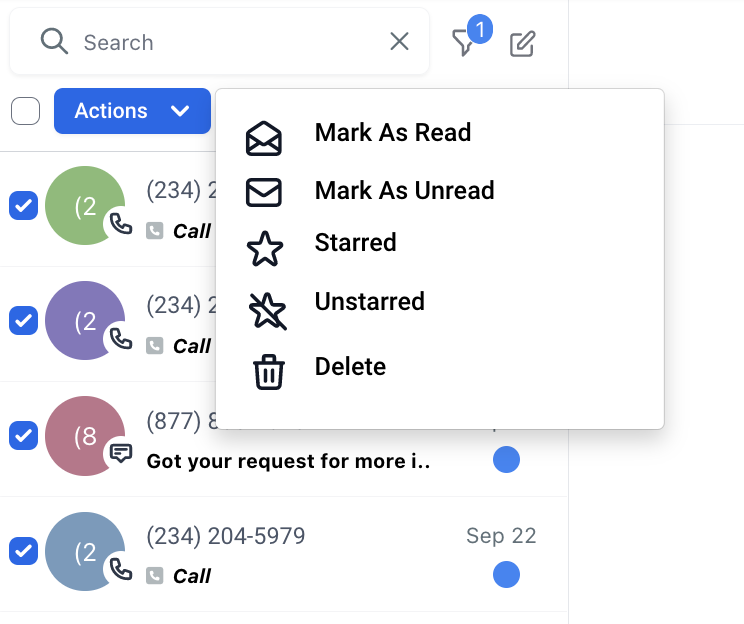
4: Marking read conversations as unread. You have a few options to do this.
- In the top right, a button marks the conversation as unread.
You can also select multiple conversations and use the ‘Actions’ tab to Mark as Read, Unread, Starred, or Unstarred for multiple conversations.
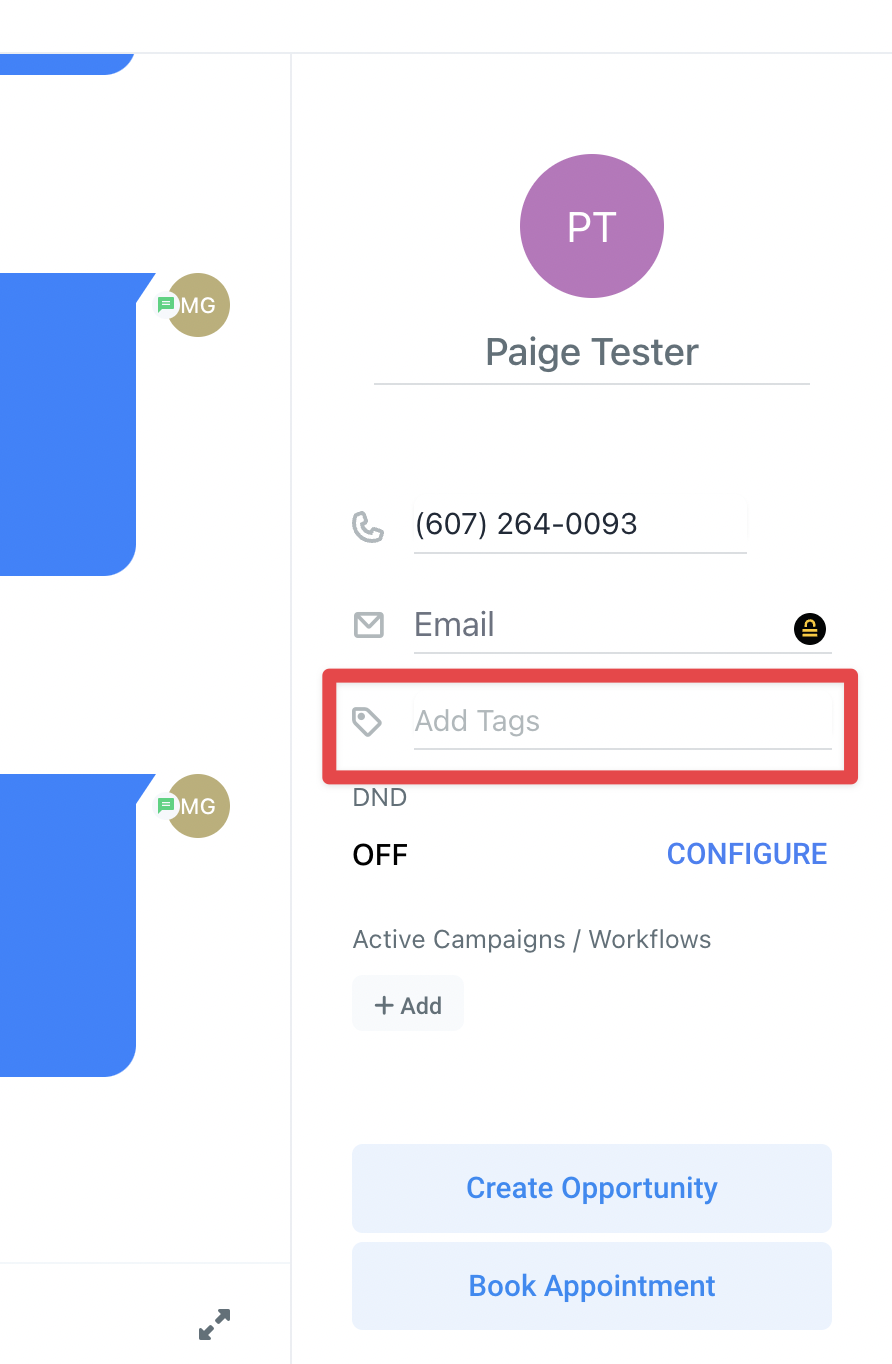
5: Adding Tags. You will see a pop-up of the User’s Contact information in the sidebar. You can add or take away tags to help organize the contact in NicheFit.
6: Starring a Conversation
- Starring a conversation is useful to mark them as important and a visible reminder to come back to this conversation.
- Starring and Unstarring can be done individually and using Bulk Actions.
7: Viewing Contact Information associated with the conversation
- The third panel on the right-hand side provides a snippet of the contact information for the user you are interacting with.
- You can click the phone button to call the phone number and view their email address.
- You can add tags, toggle on or off the DND, and add them to a campaign by clicking the add button under active campaigns.
- You can click “Create Opportunity”, fill out the appropriate details, and click “Add” to confirm.
- By clicking “Schedule,” you can book an appointment for the user.
- Conversations can be deleted or archived using the buttons in this 3rd panel too.

8: Clearing your inbox
- You can use bulk actions to mass delete messages in your conversations tab if desired.
This overview has been of what you can do in the Conversations section. This area will be used for communication with individual contacts where automation is not sufficient or appropriate.