Local Services Ad - Reserve with Google Integration
If you want to utilize Local Services Ads - Reserve with Google, you can integrate NicheFit in simple steps. You must first have a Local Services Ads account with Google. Once you’ve created that, follow along to integrate NicheFit:
Please note this feature is currently supported only for users in the United States. The integration exclusively works with the “Home Services” (Local Service providers) company niche.
Step 1: Link Your Account
- Navigate to Settings > Integrations
- Click “Connect” under the Reserve with Google option.

- In the popup window, choose the Local Service you provide from the dropdown that says “Select Your Vertical”, and click “Proceed”.
- This will open the Google Local services Ads in a new tab.
- Log in to your Google Local Services Ads account. Under “Action”, click “Link Account.”

Step 2: Connect the Calendar
- Click "Configure Calendar" on the Integrations page to navigate to your Calendar Settings within the system.
- Create and edit a calendar, and under “Connections,” check the box for Reserve with Google.

- Save to confirm your changes.
- Your Integration Status will now show as “Pending”.
- NOTE: This may take up to 48 hours to be verified by Google.
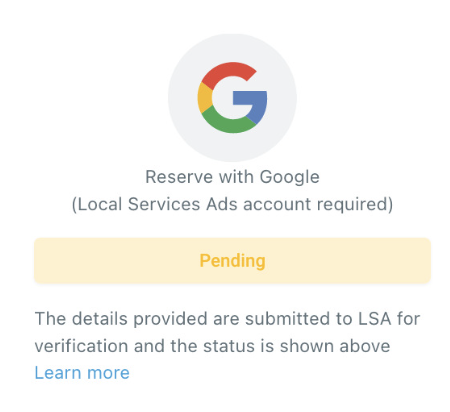
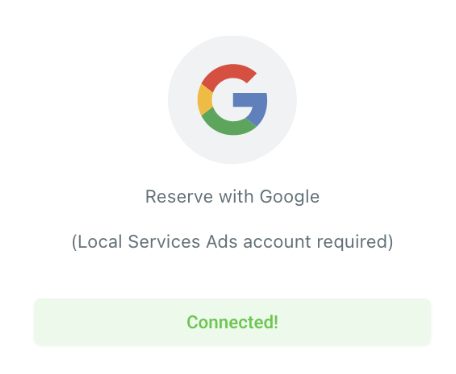
- Check back in 48 hours, and the “Pending” should now show as “Connected”.
Pro Tips:
- Navigate to Settings > Business Info > Company Name and Address to ensure this information matches your LSA Business Details. If the integration status displays as "Not Matched", your Business Info doesn’t match the LSA Business Details. You must delete and re-integrate to reset the configuration once the information matches.
- Appointments booked through Local Services Ads are managed in the calendar associated with the account.