Grouping your social media profiles and networks can help you increase your efficiency in getting content out to all your channels simultaneously. By grouping them together, you don’t have to select each account for an individual post, but you can do it all at once. Follow these steps to create groups for your Social Planner:
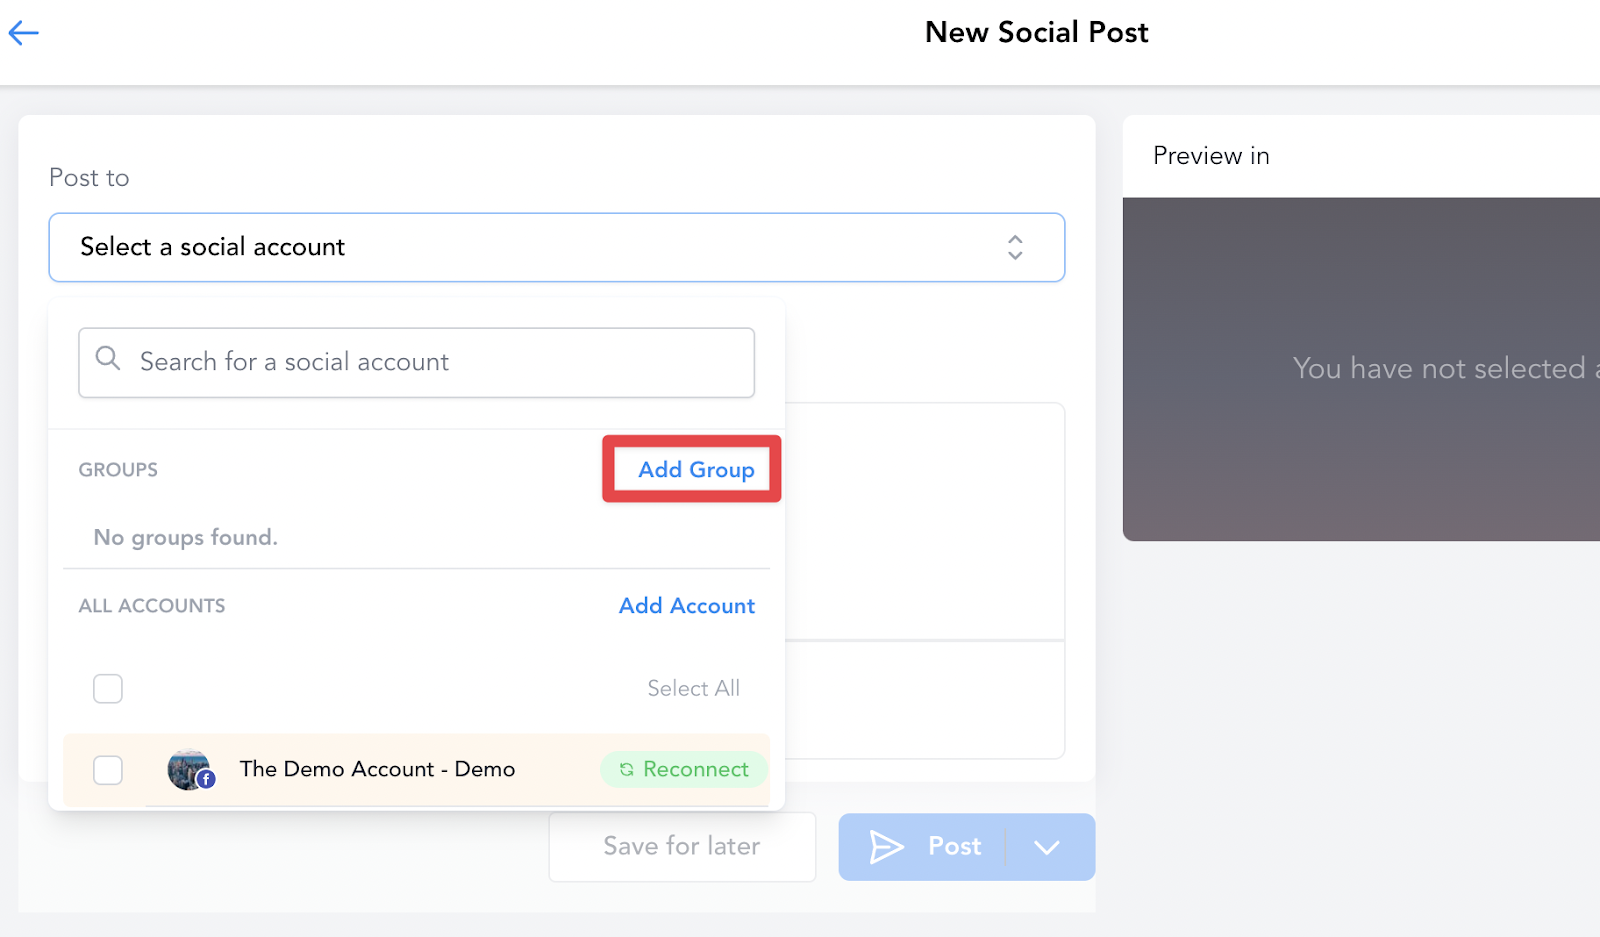
Step One: Navigate to Marketing > Social Planner.
Step Two: Click “New Post” and then click on “Add Group”.
Step Three: Enter a Group Name
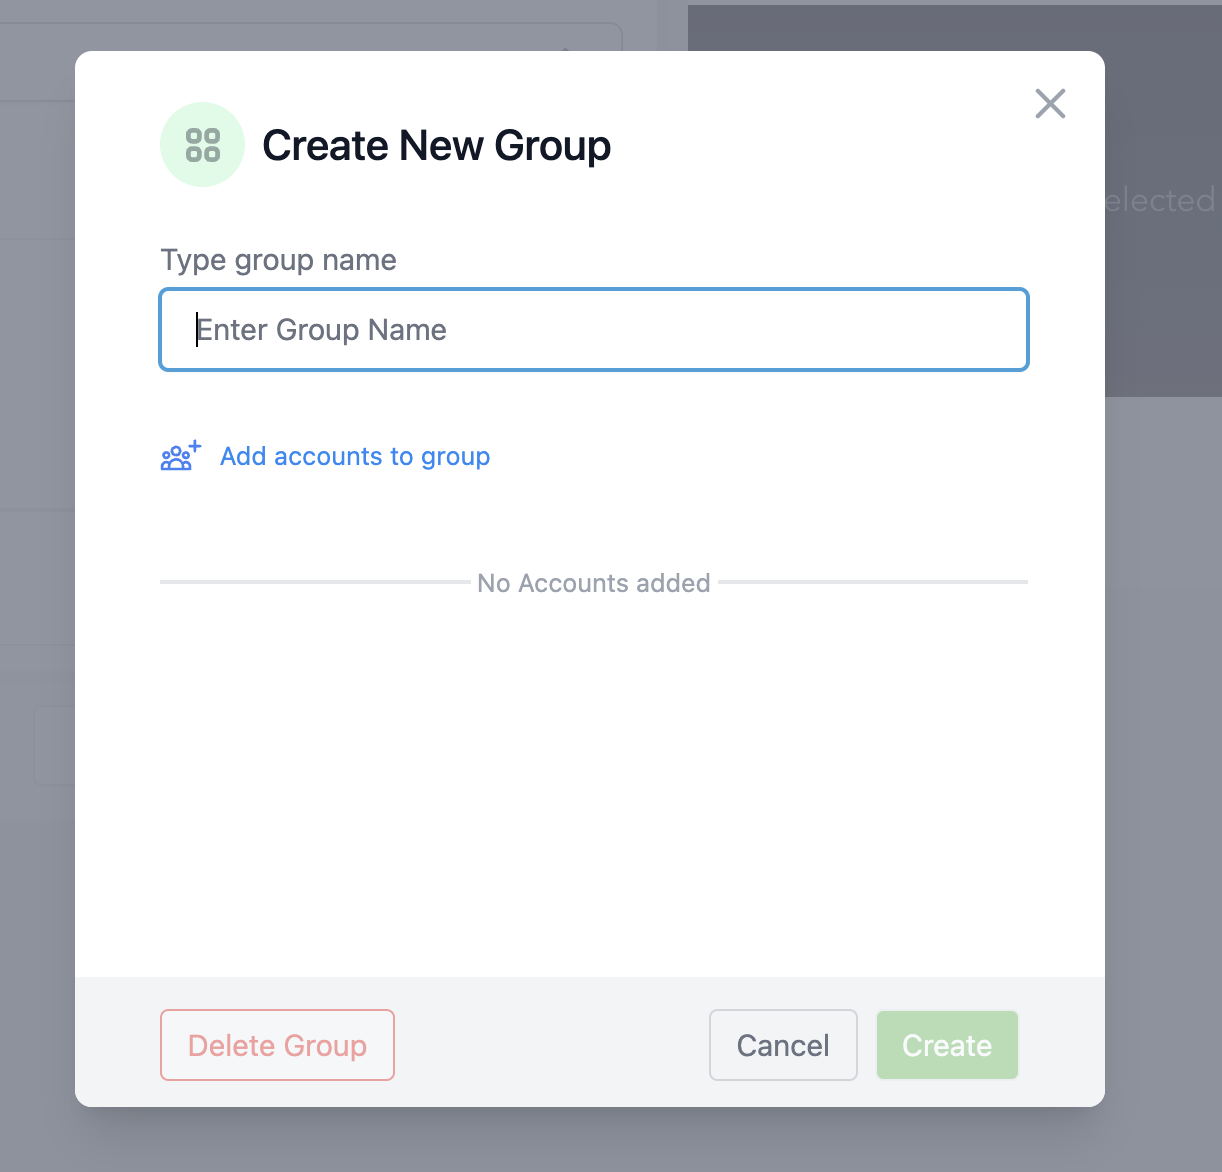
Step Four: Click “Add accounts to group” and select the social channels you want to add to a particular group.
Step Five: Click “Create” to save the group.
NOTE: if you want to make any edits to the group, click on the pencil icon to change the grouping. If you want to delete a group, click the red “Delete Group” button.
Now, you can create and publish a post and push it out to multiple social media channels, such as LinkedIn, Instagram, and a Facebook page.